You add Monitors in the Users/Monitor Information window. We recommend that you create accounts for each of your monitors when you first begin using Minute Menu HX. The Monitors you create here are available in other areas of the software. You can also assign these Monitors to specific providers.
- Click the Providers menu and select Monitors. The User/Monitor Information window opens.
Note: You can also click the Administration menu and select Users/Monitors to access this window.
- Click Add New User/Monitor.
- Click the User Type drop-down menu and select Monitor or Monitor + General HX User. If you set this user as a Monitor only, they can only record reviews in KidKare. They cannot access Minute Menu HX. If this Monitor needs access to Minute Menu HX, select Monitor + General User.
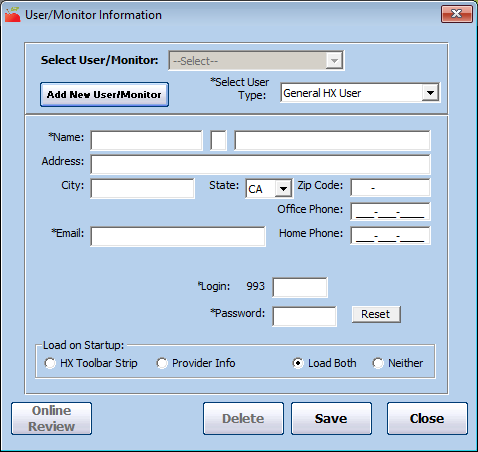
- Click the Name boxes and enter the Monitor's full name. This is the name that will appear on their paperwork.
- Click the Email Address box and enter the Monitor's email address.
Note: The Address, City, State, Zip Code, SSN, Office, and Home Phone boxes are not required, but you can complete them, if needed.
- Click the Monitor Number box and enter a monitor number. This must be a unique number. For those sponsors who can review forms, this number coincides with the two or three-digit number marked on scannable review forms. You can enter any two or three-digit number, so you can choose any numbering scheme you prefer. If you enter a number that is already in-use, the system prompts you to select a different one.
Note: The Login box defaults to the first three numbers of your sponsor numbers and the monitor number you entered. For example, if your sponsor number is 900 and you entered 201 in the Monitor Number box, the Login box would be 900201. You can change this, if needed.
- Click the Password box and enter a password for this Monitor. You can also click Reset to generate a random password. If you are creating a Monitor only (not a Monitor + General HX User), the Monitor can use their login ID and this password to log in to KidKare only.
- Click Save.
- Click OK at the confirmation prompt.
- Click Online Review. The Online Review Permissions dialog box opens.
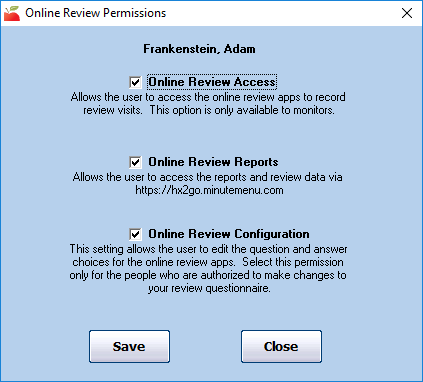
- Check the box next to each item that applies:
- Online Review Access: Allow this user to enter reviews in KidKare.
- Online Review Reports: Allow this user to access reports in KidKare.
- Online Review Configuration: Allow this user to edit question and answer choices on the review questionnaire.
- Click Save.

