Mark claims as submitted in Minute Menu HX once you have actually sent your claim paperwork to the State. Before proceeding, confirm that you do not need to make any claim changes and that the information in Minute Menu HX accurately represents what you need to use for your state claim.
Print and review the Provider Claim Totals report and the Claim Summary report before proceeding.
To mark a claim as submitted:
- Click the Claims menu and select Submit Claims to State. The Submit Claim to State window opens.
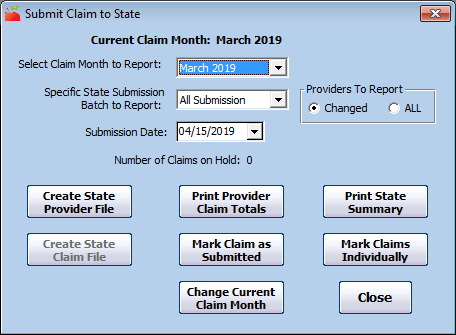
- Click the Select Claim Month to Report drop-down menu and select the claim month you are submitting.
- Click the Specific State Submission Batch to Report drop-down menu and select All Submission or Current.
- In the Providers to Report section, select Changed or All.
- Click the Submission Date box and select the submission date. This defaults to the current date.
- Click Mark Claim as Submitted. All un-submitted claim records within the claim month you selected are marked as submitted and flagged with the date you set in Step 5. These records are locked and can no longer be changed. This excludes any claim records that are currently on hold. The Number of Claims on Hold field notes how many claims are on hold for the selected claim month.

Note: If you must later re-process claims included in a submitted batch, an adjustment record is created for the affected claim. The counts on this record are equal to the difference between the original processed counts and the counts when it is re-processed. For more information, see Change/Adjust Claims.
You can also mark individual claims as submitted, rather than marking them as part of a batch. You would typically do this if there are a few claims that should not be marked as submitted, but you don't want to put them on hold.
- In the Submit Claim to State window, click Mark Claims Individually. The Mark Claims Individually to Submit window opens.

- Click the Submission Date box and select the submission date. This defaults to the current date.
- Check the box next to each claim to submit.
- Click Submit.
