Use the Direct Entry feature in Minute Menu HX to process hand-written claims forms for those providers who do not claim online via KidKare. When you use Direct Entry, you must still process menu foods by hand and examine the nutritional components of the claim. However, you can enter attendance information directly into Minute Menu HX, which means HX can process the claim for you. Entering attendance information is akin to scanning claims with Attendance Menu forms.
Minute Menu HX does a large number of edit checks when it processes claims for you. However, it is a good idea to check the following when you enter the claim:
- No child is claimed for more than two (2) meals and one (1) snack or two (2) snacks and one (1) meal each day.
- School-aged children are not attending AM Snack or Lunch on school days without a valid reason.
- Providers are not serving meals for which they are not approved, and they are not serving meals on days of the week for which they are not approved.
- Providers are not over capacity, even when allowing for split-shift servings.
- Children in a Mixed Tier home are being paid at the appropriate Tier. Specifically, note those children who should be paid at Tier 1 rates.
See Error Codes for more information about the specific errors you may see when processing claims.
To record a Direct Entry claim:
- Click the Claims menu and choose from the following, according to the layout of your manual forms:
- Record Full Month Attendance by Meal: The data entry process is organized around the meal. Use this option if your manual forms are organized so all meals are found together on the form. Go to Record Attendance by Meal.
- Record Full Month Attendance by Child: The data entry process is organized around the child. Use this option if your manual forms are organized so all of a child's attendance (for all meals) is found together on the form. Go to Record Attendance by Child.
Record Attendance by Meal
- You are in the current claim month by default. If you are recording a late claim, click the Select Claim Month drop-down menu and select the claim month.
- Click the Provider drop-down menu and select the provider for whom to record claims. The Record Full Attendance by Meal window loads the provider's children and focuses on Breakfast by default.
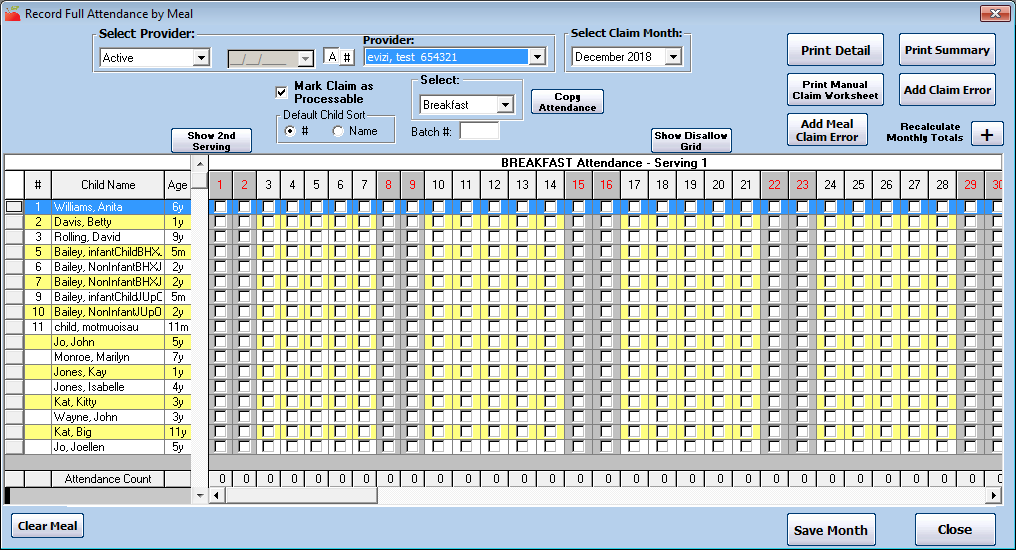
- Click the Child Name column or the # column (if HX is configured to use child numbers) to sort the displayed children. Try to match the order in which children are listed on the form. You can click the Child Name column up to four times to change the display. Clicking a fifth time returns the sort to the first option.
- 1: Sort alphabetically by child's last name in ascending order.
- 2: Sort alphabetically by child's last name in descending order.
- 3: Sort alphabetically by child's first name in ascending order.
- 4: Sort alphabetically by child's first name in descending order.
- If this provider serves meals in split shifts, click Show 2nd Serving to display the second serving columns.
- For each child, check the box for each day the child was present for the meal/serving.
- You can use your keyboard to move through the grid. To do so, click in the grid and press the arrow keys to move forward/backward. Press Space to check the box. Each column header is highlighted in blue when you move into it.
- Click
 next to a child name to check all of the weekday boxes for that child. Click it again to clear the boxes.
 - You can copy the monthly attendance schedule from one child to another. This is useful if there are two children from the same family. To do so, click the name of the child you are copying and type Ctrl + C. Click the child name to which to copy, and type Ctrl + V. Note that this only copies attendance for the selected meal.
- Check the column footers and the Total column to the right as you mark children in attendance to ensure there are no errors. Click
 to recalculate the totals as you work.
 - Click the Select drop-down menu and select the next meal to record. Repeat Step 5 & Step 6 for the remaining meals.Note: If the attendance pattern at the new meal is the same as the one you've recorded, click Copy Attendance. Then, in the Select Meal to Copy From section, select the meal from which to copy attendance. Attendance is copied to the new meal you selected.
- When finished recording meals, click Save Month.

 next to a child name to check all of the weekday boxes for that child. Click it again to clear the boxes.
 to recalculate the totals as you work.
Record Attendance by Child
- You are in the current claim month by default. If you are recording a late claim, click the Select Claim Month drop-down menu and select the claim month.
- Click the Provider drop-down menu and select the provider for whom to record claims.
- Click the Select Child drop-down menu and select the child for whom to record attendance.
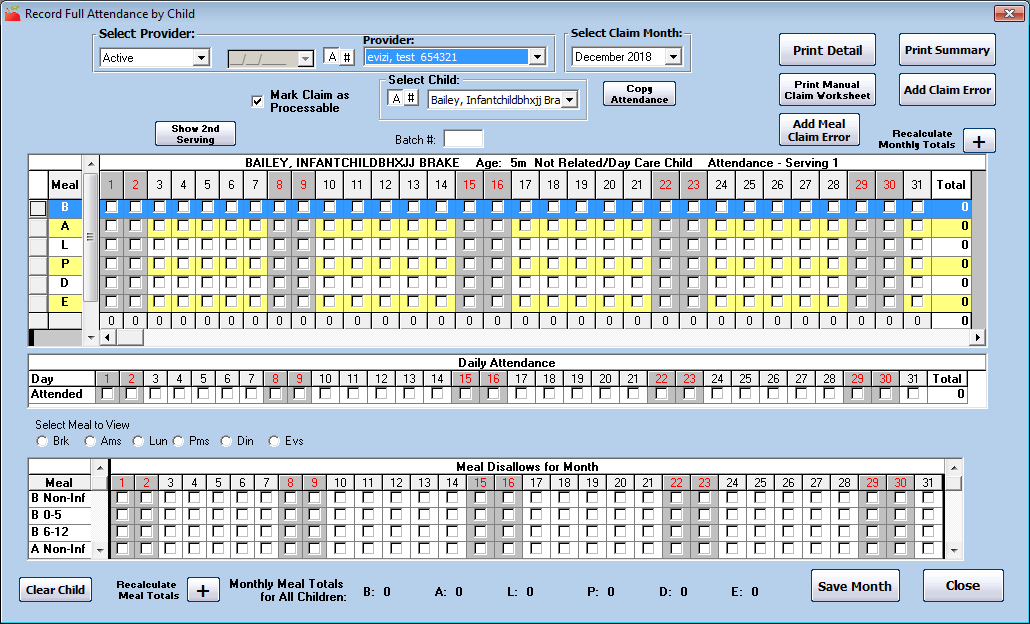
- If this provider serves meals in split shifts, click Show 2nd Serving to display the second serving columns.
- For each meal, check the box for each day the child was present for the meal/serving.
- You can use your keyboard to move through the grid. To do so, click in the grid and press the arrow keys to move forward/backward. Press Space to check the box. Each column header is highlighted in blue when you move into it.
- Click next to a meal to check all of the weekday boxes for that child. Click it again to clear the boxes.
- You can copy the monthly attendance schedule from one meal to another. To do so, click the meal you are copying and type Ctrl + C. Click the meal to which to copy, and type Ctrl + V. Note that this only copies attendance for the selected meal.Note: Checking a box for a meal also automatically checks the corresponding box in the Daily Attendance section.
- Check the column footers and the Total column to the right as you mark children in attendance to ensure there are no errors. Click to recalculate the totals as you work.
- Click the Select Child drop-down menu and select the next child for whom to record attendance. Repeat Step 5 & Step 6 for the remaining meals.Note: If the attendance pattern for the new child is the same as the one you've recorded, click Copy Attendance. Then, click the Select Child to Copy drop-down menu and select the child from which to copy attendance. Attendance is copied to the new child you selected.
- When finished, click Save Month.

Disallowing Meals
Once you have entered attendance with either method, manually check the provider's menus. If there are any meals that should be disallowed per USDA meal pattern regulations, you can disallow them in the Record Full Attendance by Child/Meal window.
- If you are using the Record Full Attendance by Meal window, click Show Disallow Grid to display the disallow grid for the selected meal. This grid always displays in the Record Full Attendance by Child window.
- Check the box for the day on which to disallow a meal for a specific child. This applies a generic disallowance for the meal/child.
- Click Add Meal Claim Error to apply a specific error to the disallowance. For more information, see Manually Enter Claim Errors for Direct Entry Claims.
Checking Your Data Entry
When you have finished the Direct Entry process, you should check your data entry to ensure there aren't any errors. Once you save your data, click Print Summary to print the Claimed Attendance Summary report. This report provides a day-to-day set of meal totals and shows the count of the number of children marked in attendance.
You can also click Print Detail to print a child-by-child list of all children claimed.