We have worked with the State of New York to create a file that maps to the CACFP Information and Payment System (CIPS). This allows New York sponsors to export their child data from Minute Menu HX and upload it directly to the state CIPS website.
For more information about this feature, see the CIPS Manual and the State of New York's Release Notes.
Before You Begin
To use this feature, you must do the following:
- Enable the G.011 Alternate Child ID preference.
- Enter the CIPS Participant ID into the Alternate Child ID box in the Child Information window.
Enabling the G.011 Alternate Child ID Preference
If you do not enable this preference, the Alternate Child ID box does not display in the Child Information window.
- Click the Administration menu and select Sponsor Preferences. The Sponsor Preferences window opens.
- Click the Select the Category to Move To drop-down menu and select G. Child Info - Child Tab.
- Check the box next to 011 Display Alternate Child ID. This is the last preference under the G. Child Info - Child Tab heading.
- Click the Select Setting drop-down menu, and select Y.
- Click Save.
Entering the CIPS Participant ID Into the Alternate Child ID Box
Now, enter the child's CIPS Participant ID in the Alternate Child ID box in the Child Information window.
- Click the Providers menu and select Child Information. The Child Information window opens.
- Click the Provider drop-down menu and select a provider.
- Click the Child drop-down menu and select the child to edit.
- In the Child tab, click the Alternate Child Id box and enter the child's CIPS Participant ID.
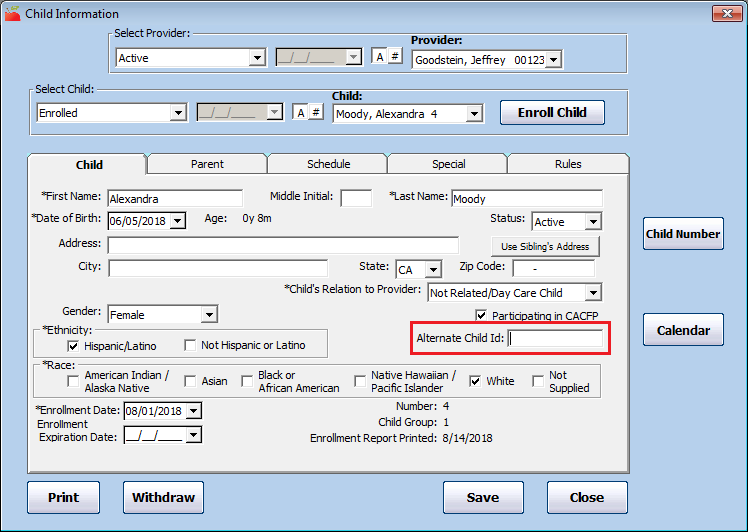
- Click Save.

Note: Double-check the child's name before exiting this window. If the child's name does not match their name in CIPS exactly (even if it is a middle initial that is not in CIPS), a duplicate record will be created. Correct any errors you find.
Preparing to Export
Once you are ready to export the CIPS file, do the following before exporting to avoid errors:
- Ensure all child names in HX match the child names in CIPS exactly. If a name does not match and you upload the file without correcting it, a duplicate is created. Correct any errors you find.
- Double-check that all Alternate Child IDs match the appropriate CIPS Participant IDs.
- Withdraw any inactive children.
Exporting the CIPS File
We recommend that you export the CIPS file and upload it to CIPS monthly, as well as whenever child data changes. This ensures that your claim data matches CIPS records. Note that child data in CIPS is overwritten by the data uploaded from the CIPS file.
The exported file saves to the C:\MMHX\Sponsor\Export\ folder.
- Click the Claims menu and select Submit Claims to the State. The Submit Claim to State dialog box opens.
- Make sure that the correct claim month is selected in the Select Claim Month to Report box.
- Adjust the remaining settings, as needed.
- Click Export CIPS Child File. The Select Provider dialog box opens. There are three ways to export provider information:
- To export a single provider, go to Step 5.
- To export multiple providers, go to Step 6.
- To select providers from a list, go to Step 7.
- To export a single provider:
- Select the Selected Provider option.
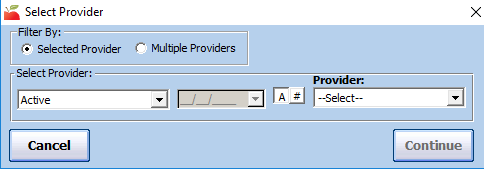
- Click the Provider drop-down menu and select the provider to export.
- Click Continue. The report is generated. Go to Step 8.
- Select the Selected Provider option.
- To export multiple providers:
- Select the Multiple Providers option.
- Click Continue. The Provider Filter window opens.

- Set filters for the providers to include in the export. If you do not set any filters, all providers will be exported.
- Click Continue. The file is generated. Go to Step 8.
- To select providers from a list:
- Select the Multiple Providers option.
- Click Continue.
- Set filters, if needed.
- Check the Choose Providers From List box.
- Click Continue. The Choose Providers dialog box opens.

- Check the box next to each provider to include in the export. You can use the #, Move to Provider, and Quick Select boxes to find specific providers.
- Click Continue. The file is generated.
- Upload the file to CIPS. For instructions, see the CIPS Manual.


